Getting Started With Arduino
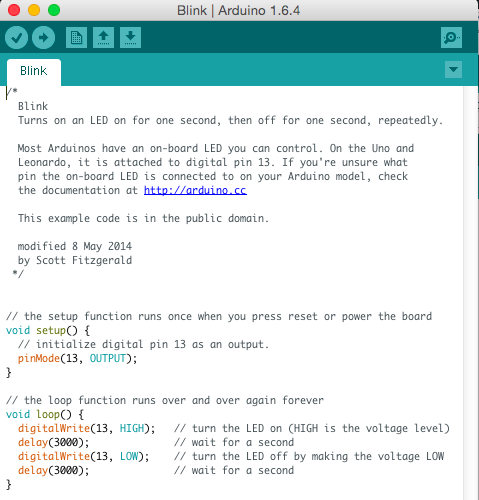

code


Dave Cormier did a nice post about getting his kids (7 & 9) playing and learning with an Arduino starter kit for Christmas. (Kits run about $100-150 but you can buy an Arduino board for about $20 if you're already working with maker electronics and coding.) If you are an adult, kid, parent or teacher, this first (with more to come?) post is a nice intro into this popular maker tool.

One very basic thing he discovered is that you do need to understand code. You don't need a lot of experience with it, but if you have never looked at code (even HTML web page code), it will seem a bit confusing at first.  

Arduino uses a simplified version of C++ and most people will be able to figure out by context clues (Ah, like reading!) some of what the code is doing.

He also learned right away that "arduino" is also software that you need to download and put on your computer.

As you start to write you "sketch" (code) in order to upload it to your Arduino hardware via a USB cable, you discover that there are lots of sketches available online and with the arduino software itself to get you started. But you will need to learn new stuff.

He shows a simple example of some code with notes (shown above). This code tells the Arduino to send power to pin 13 and then to turn pin 13 on and off at 3 second intervals.

If your Arduino board has an LED bulb in pin 13, it will light up according to those commands.

But he also had to learn that the LED needed to plug into the ground that is right next to it and hat the long leg of the LED is the ‘+’ and it goes in pin 13 and the short leg of the LED is the ‘-‘ and goes in the ground. 

Okay, that's not exactly amazing output, but Dave and his kids are a ways off from building a robotic obstacle-avoiding car (like the one in the video below) which requires more parts, some building and more coding - but it is doable.

You can read Dave's first post on his blog and follow his learning. Let's see where the Cormiers go with this.


Making Space for DIY Innovation on Campus


This week I will be at the NJEDge.Net Annual Conference whose theme this year is Rethink Refresh Reboot.- three things you should get from any good conference. NJEDge.Net is a non-profit technology consortium of academic and research institutions in New Jersey. It supports its members in their institutional teaching and learning; scholarship; research and development; outreach programs; public service, and economic development, and provides our broadband statewide network.

I'll be doing a 2-hour workshop on "Making Space for DIY Innovation on Campus" with Danielle Mirliss from Seton Hall University and Emily Witkowski, from the Maplewood Public Library.

We deliberately avoided saying "makerspaces" in the session title for two reasons. One, people who have heard of the term immediately envision a very techy room with a 3D printer and scanner and lots of computer parts, and although that does sound like a makerspace, that's not all the spaces we are talking about. These spaces can have hand tools, wood and fabrics, sewing machines, laser cutters and many other devices and tools. And they might be called innovation spaces, fabrication labs, rapid prototyping centers or hackerspaces.

These places over the past decade have increasingly increased as community spaces offering public, shared access to high-end equipment and guidance to using them.

You can work with technologies like desktop fabrication, physical computing, and augmented reality in these do-it-yourself workspaces. Naturally, the first subject areas to build and use makerspaces in schools were the STEM areas, but we are also interested in the way they are being used in for applications and research in the humanities and arts.

Our workshop will offer information on creating, branding and maintaining spaces on campus, in libraries or in the community. We will also show examples of DIY projects and discuss their applications to the classroom, and participants will try a hands-on activity.